Configuring Profiles for Partner Community Users (Exchange + Salesforce)


Customers with Salesforce Partner Community Users will need to configure the Salesforce Host at the Profile level within Cloud Edition. In this section, you will learn how to configure Profile settings to support Partner Community integration.

cursor-48

Click the images throughout the Knowledge Base to see full size versions of screen captures.


Configuring Profiles for Partner Community Users

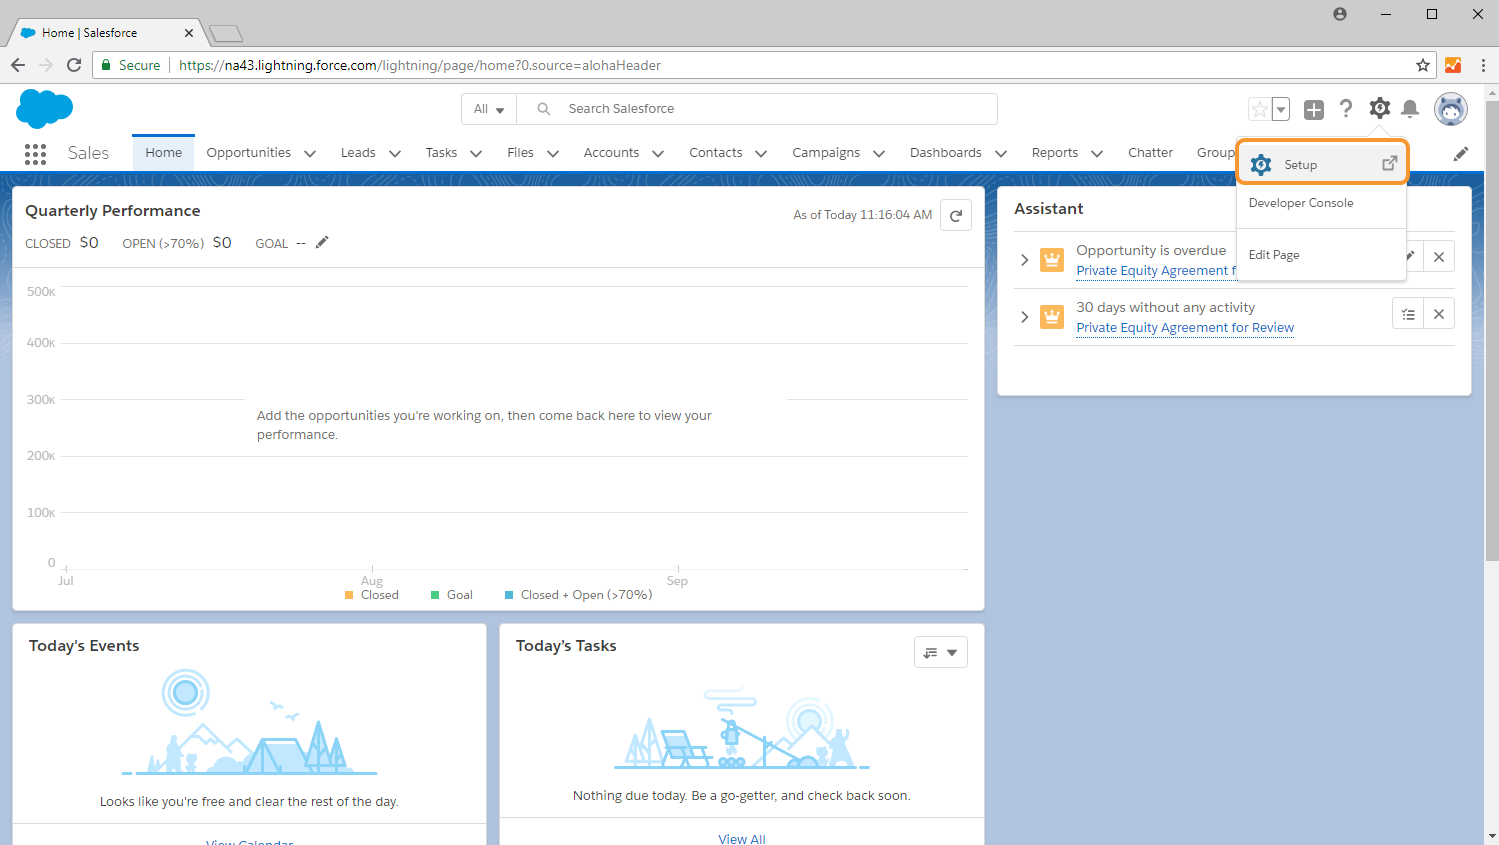
Step_1 Login into Salesforce, select Setup, and navigate to All Communities.


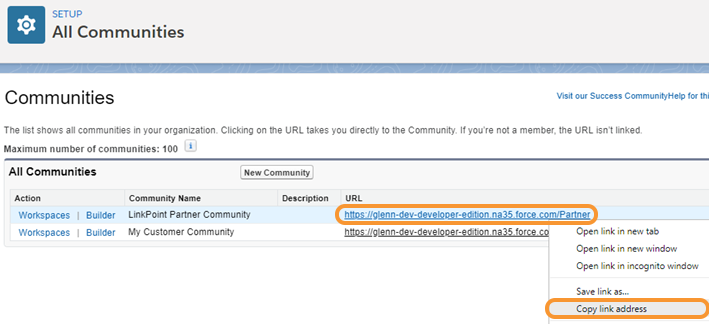
Step_2 Locate the Partner Community URL and copy the URL to a text document for reference.


Example: In this example, the URL to note for later is glenn-dev-developer-edition.na36.force.com/partner


Step_3

Locate the Partner Community ID. Right click the Partner Community URL and select Copy link Address from the menu. Copy the ID to a text document for reference.


Example: In this example, the option to Copy link address provided the URL: https://glenn-lp360-dev-ed.my.salesforce.com/servlet/networks/switch?networkId=0DB4100000000ou. The Partner Community ID is the last section of the URL: 0DB4100000000ou.


Step_4

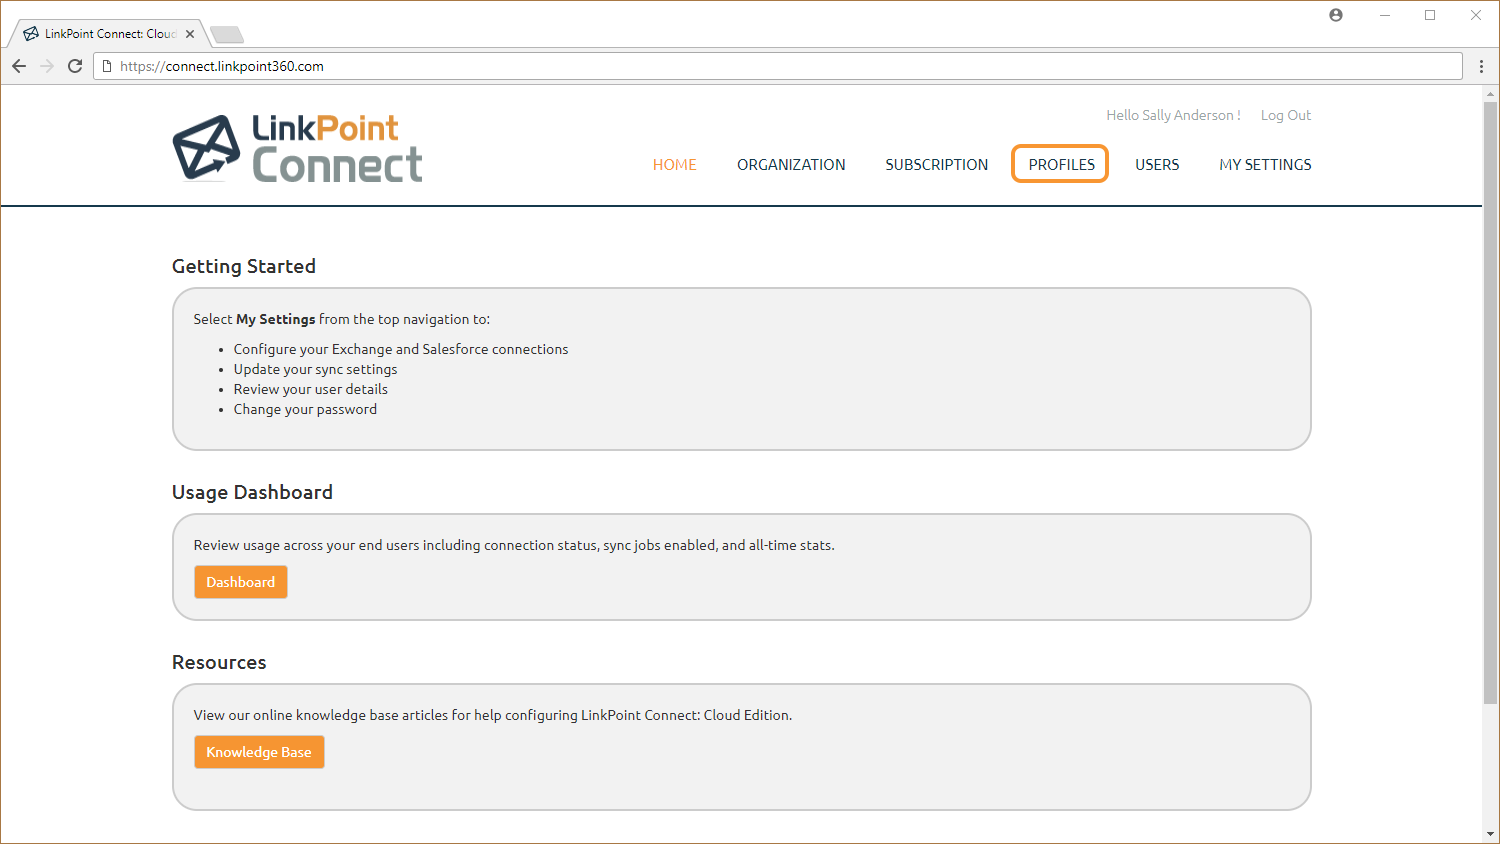
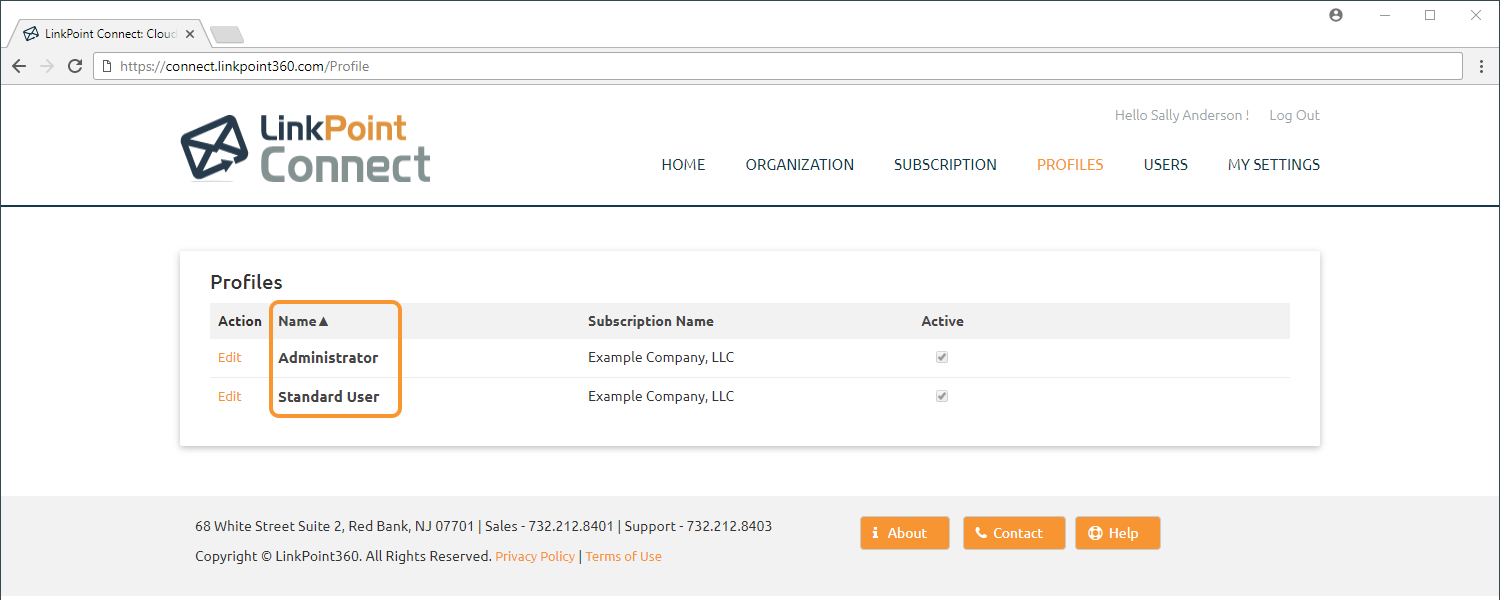
Log into Cloud Edition and select Profiles from the top navigation.


Select a Profile Name to view the full Profile.


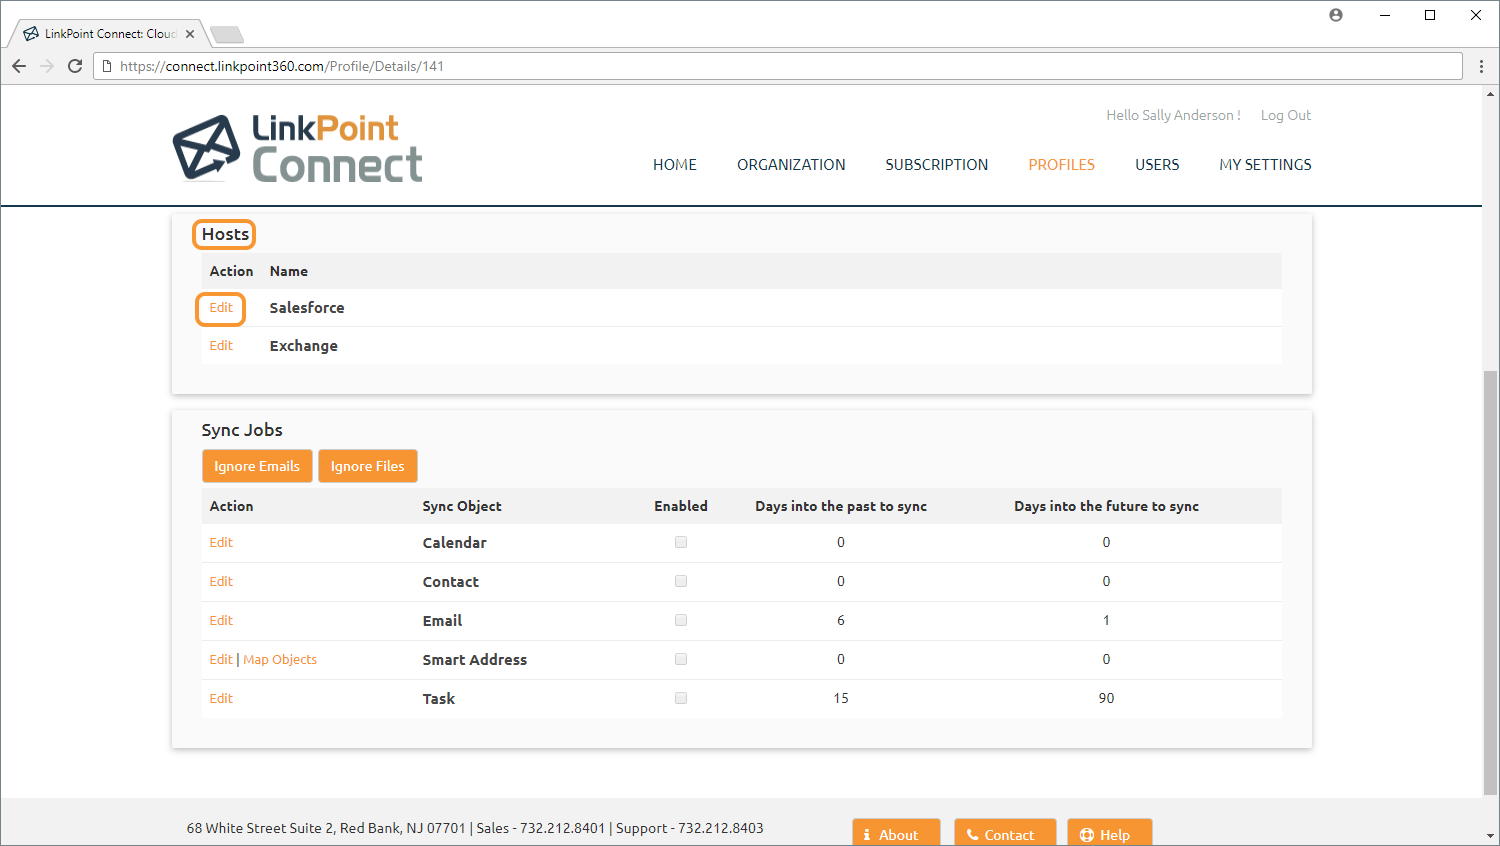
Select the Edit link for the Salesforce Host to view the Salesforce connection options.


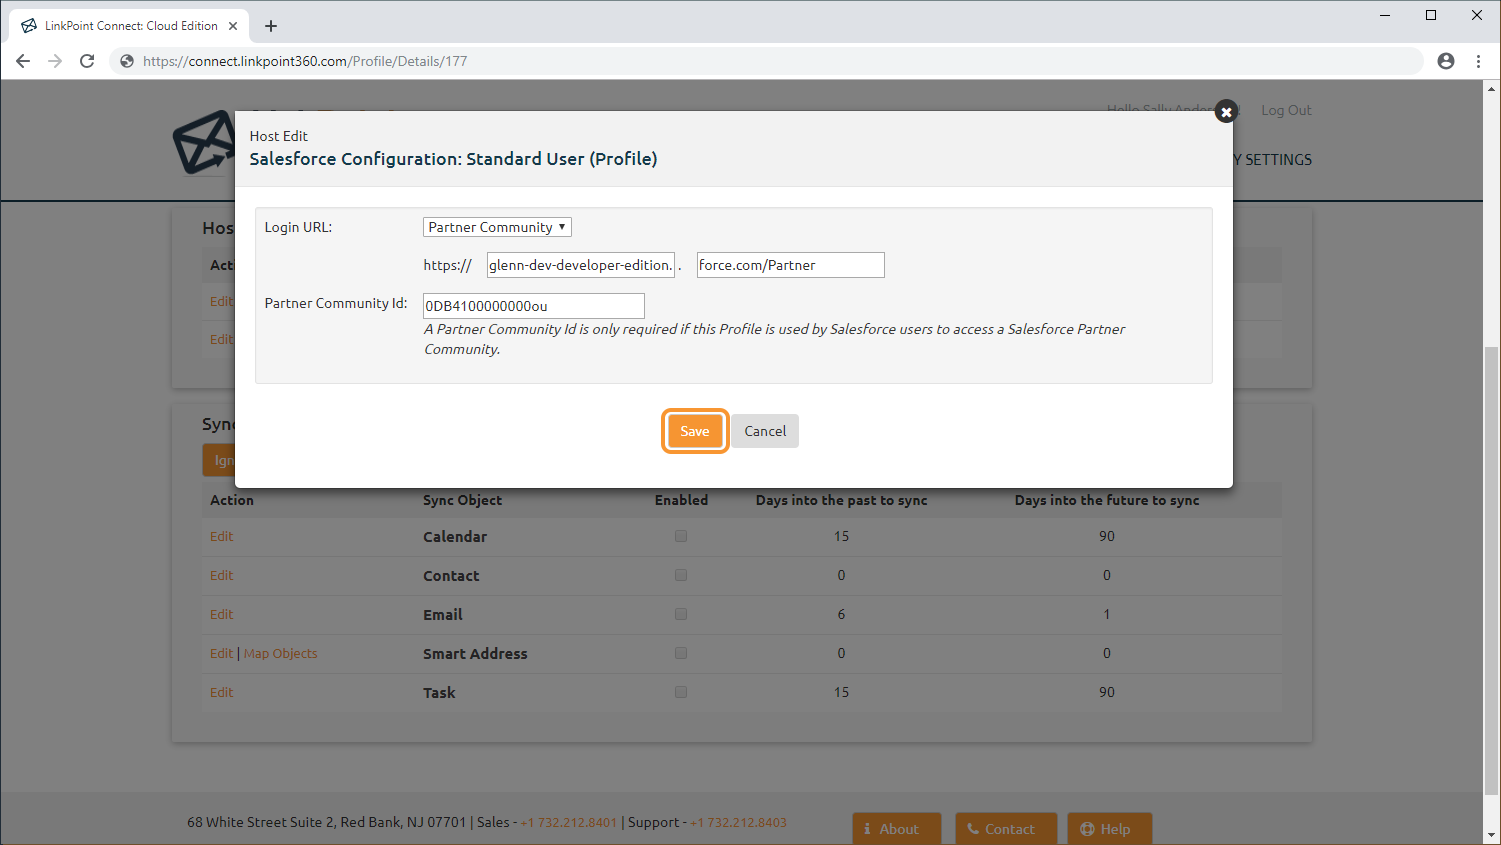
Select the Login URL drop-down list and select Partner Community.


Enter the Login URL and Partner Community ID information noted in Steps 2 and 3.


Click Save to confirm the changes and then close the Edit Profile window.


Download_WebDownload: Access the complete LinkPoint Connect: Cloud Edition (Exchange + Salesforce) User Guide in .pdf format. Get the User Guide


Support_Web Still need help? Contact our Support Team.