
Create Outlook Records
Drag and Drop Email Signatures
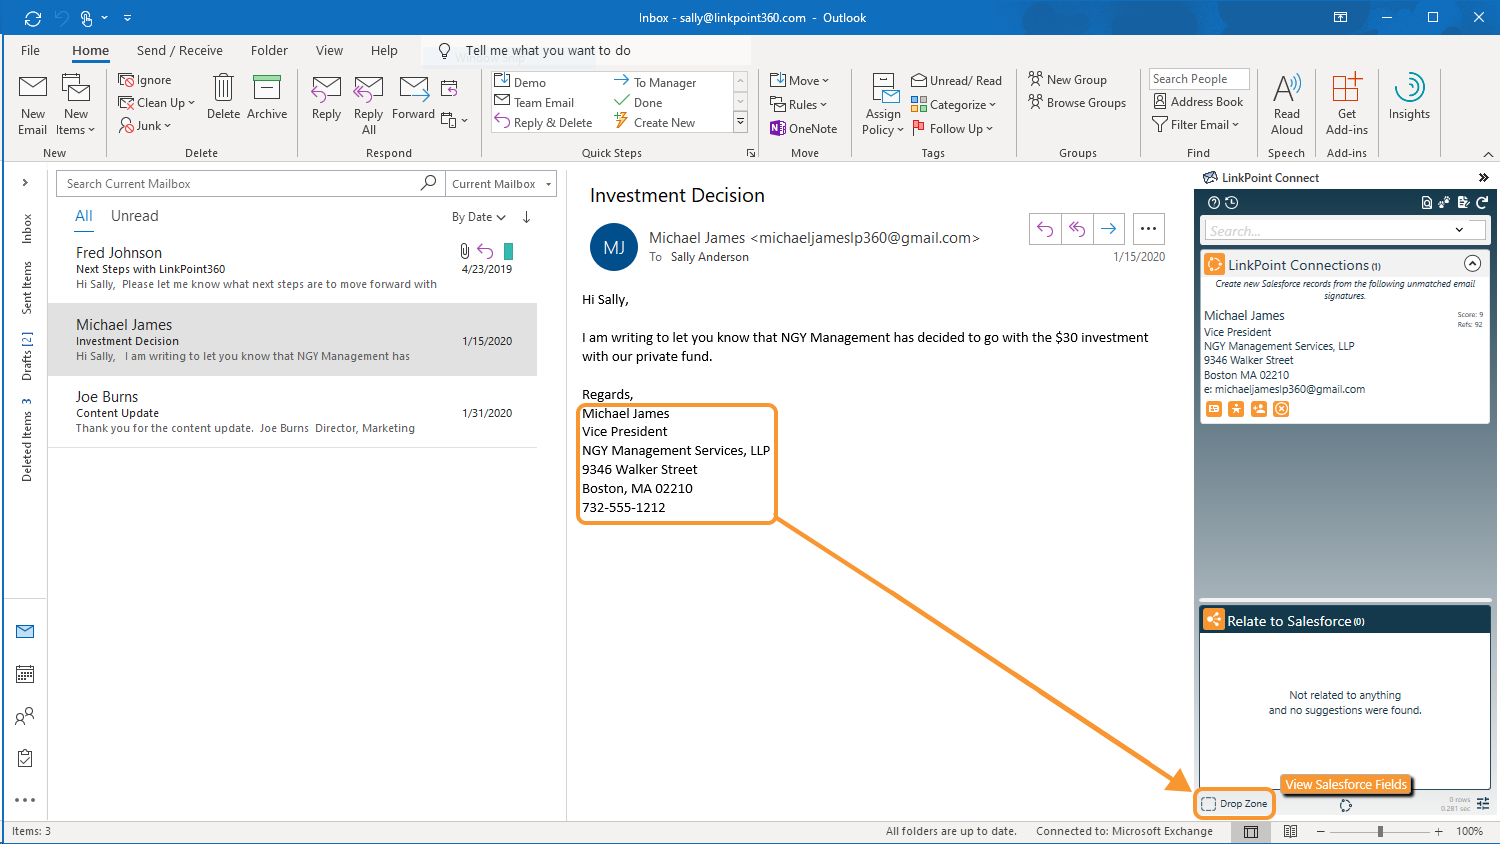
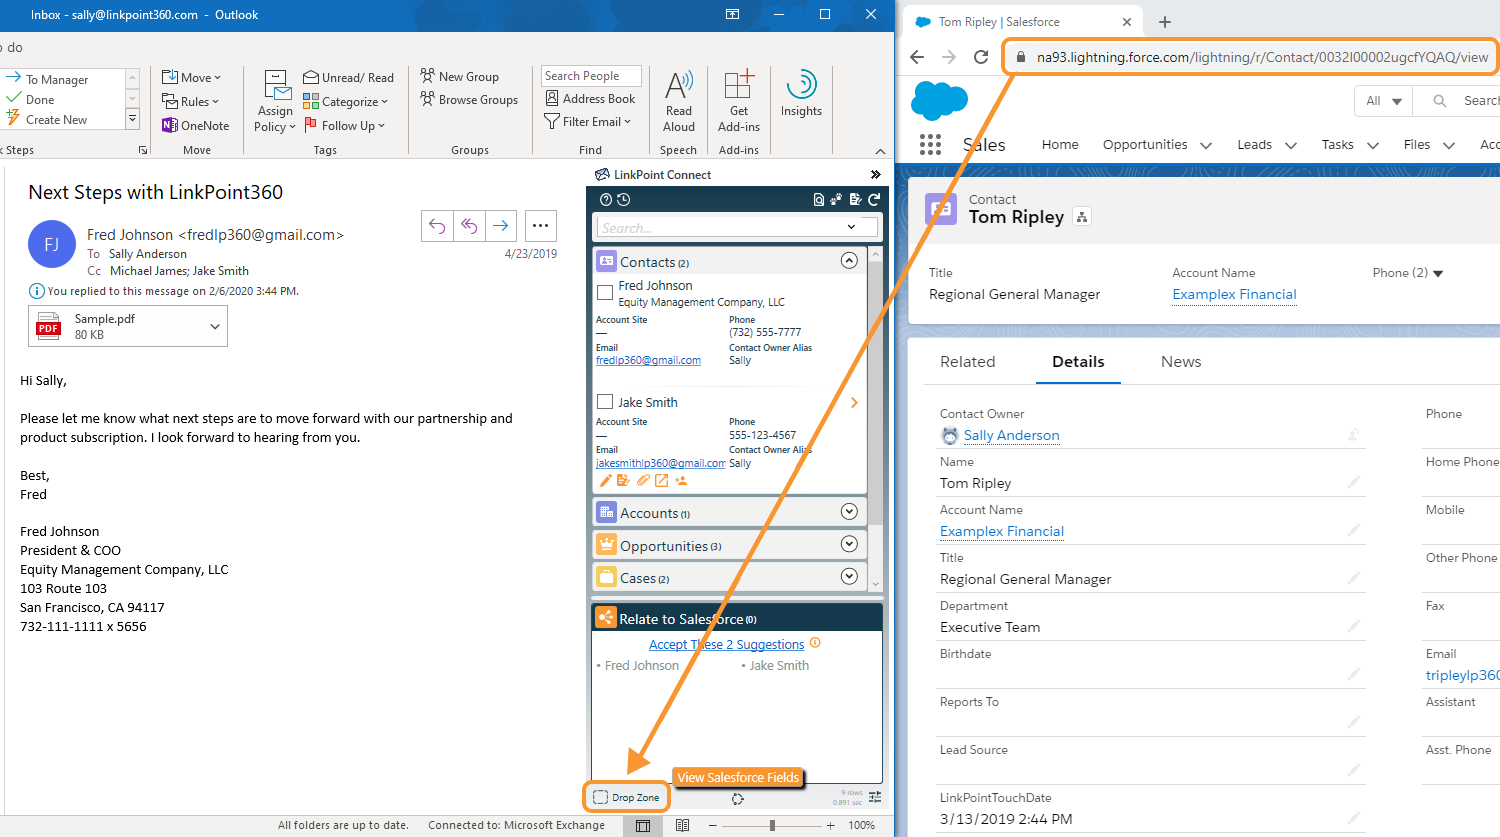
Highlight an email. Drag the highlighted signature to the Drop Zone at the bottom of the Side Panel and release the selection over the icon.
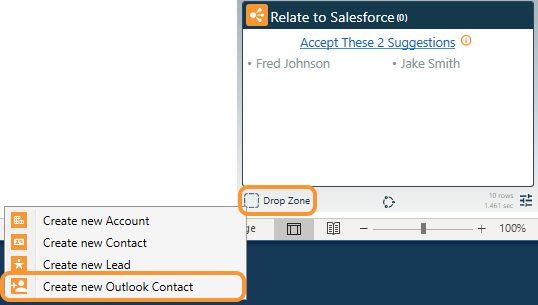
Select Create new Outlook Contact from the available list.
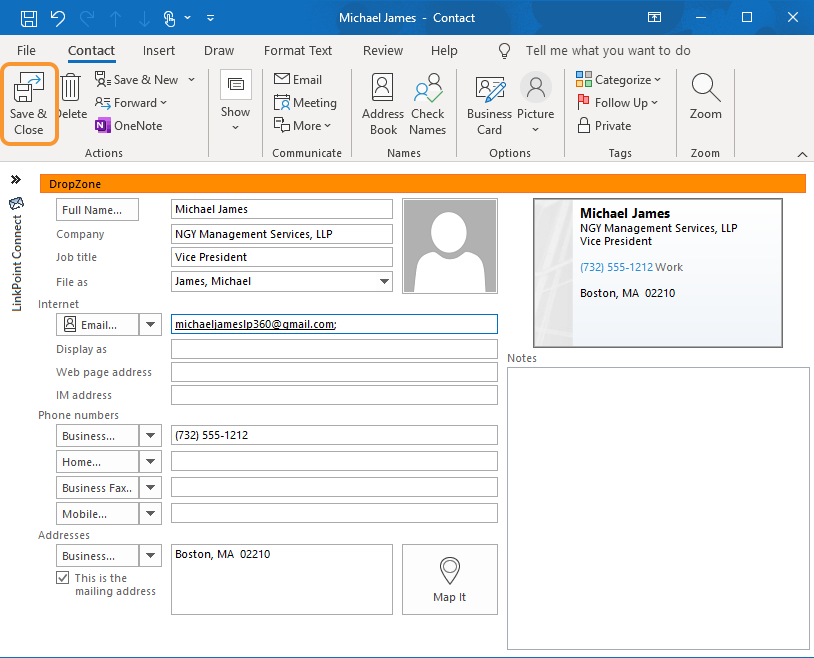
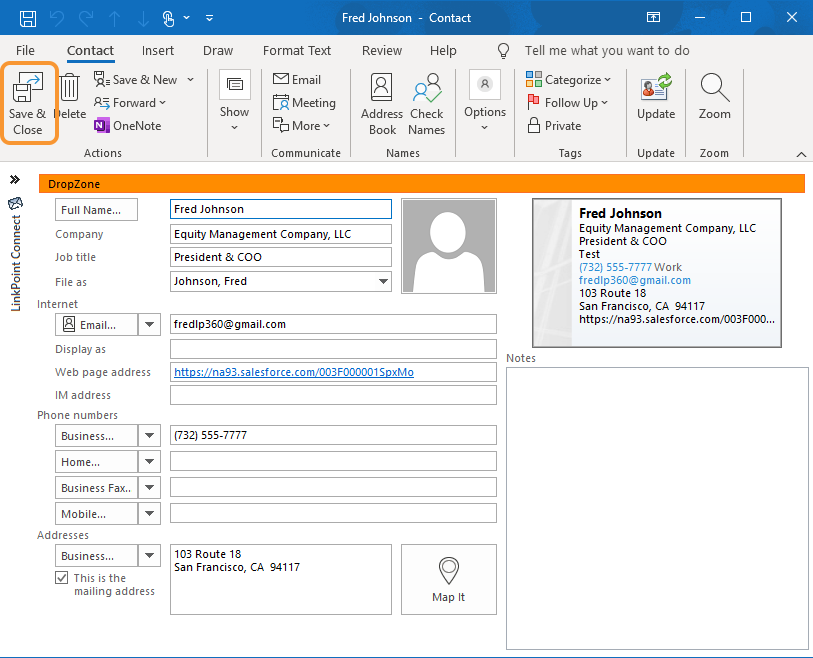
Review and enter any required or additional information in the Outlook Contact Form. Note that some fields are prepopulated based on the email signature. Click the Save & Close button when finished to create the record in Outlook.
Send to Outlook Icons
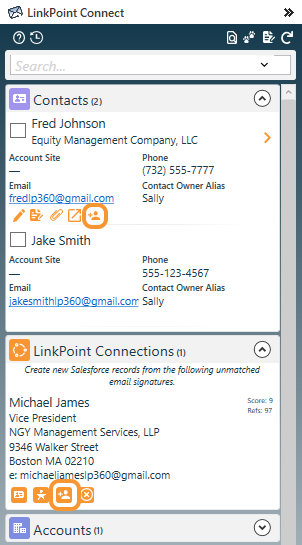
Click the Send to Outlook icon any Contact or Lead record or a LinkPoint Connections record in the Side Panel.
Review and enter any required or additional information in the Outlook Contact Form. Note that some fields are prepopulated based on the email signature. Click the Save & Close button when finished to create the record in Outlook.
Drag & Drop Salesforce URLs
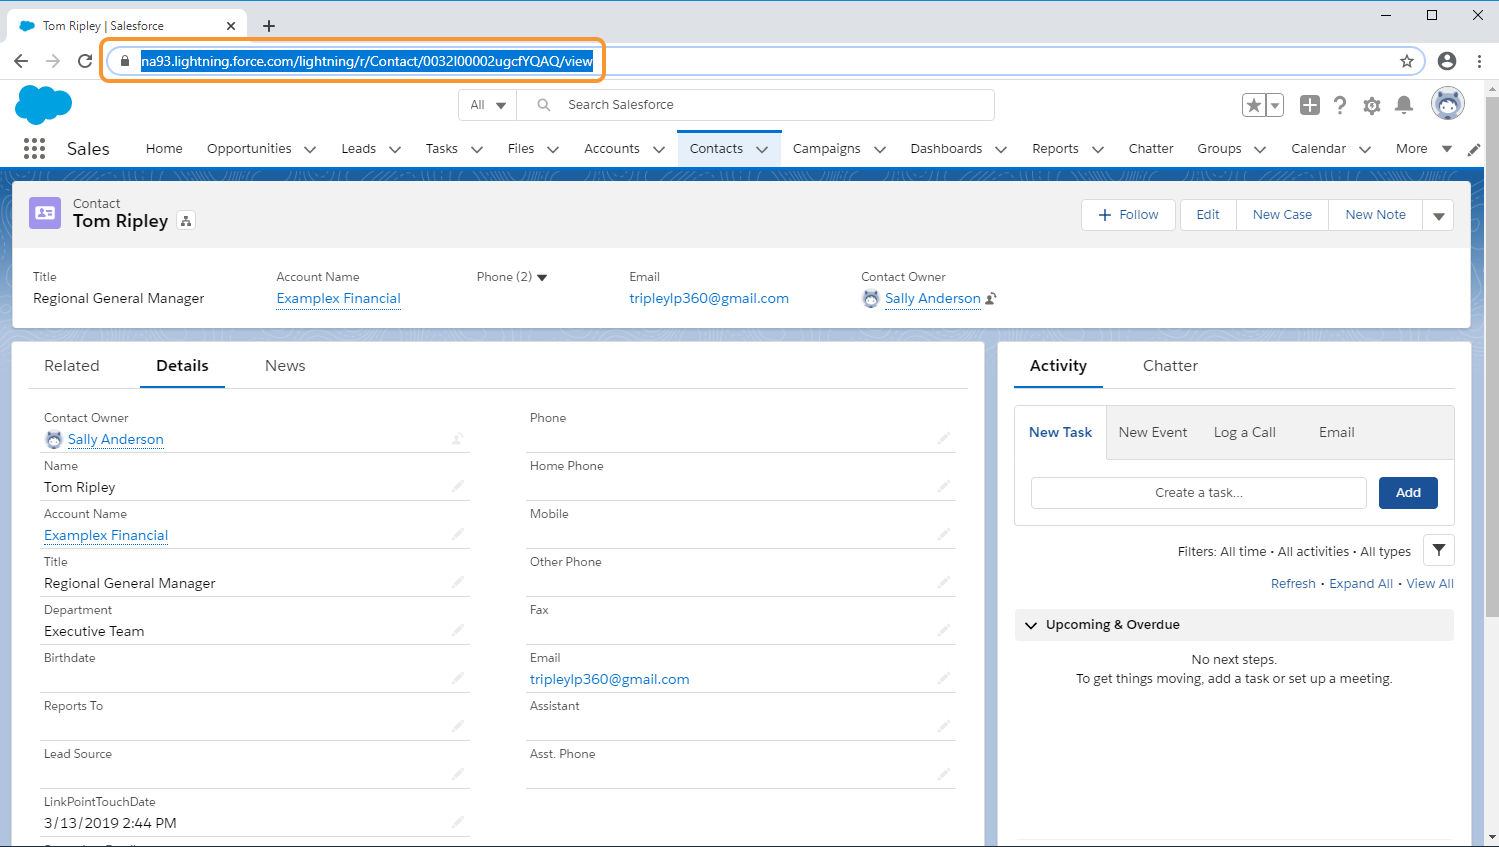
View a Salesforce Record in a web browser. Highlight the URL in the address bar.
Drag the highlighted URL to the Drop Zone at the bottom of the Side Panel and release the selection over the icon.
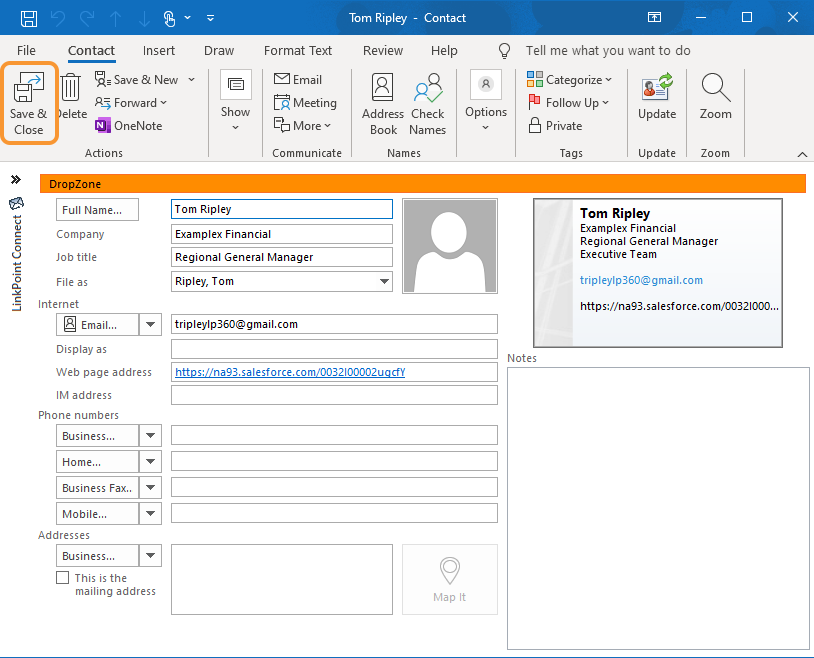
Review and enter any required or additional information in the Outlook Contact Form. Note that some fields are prepopulated based on the email signature. Click the Save & Close button when finished to create the record in Outlook.

Download: Access the complete LinkPoint Connect User Guide in .pdf format. Get the User Guide


