Creating a New Salesforce Opportunity from IBM Notes

LinkPoint Connect promotes CRM adoption by offering a variety of shortcuts to encourage users to add new contacts, opportunities, and accounts to Salesforce. This can be done easily from IBM Notes.

Tip: Depending on how an organization has configured LinkPoint Connect to mirror your existing business processes, users may not have all of the options described in the following section. Contact your admin for more information.

cursor-48

Click the images throughout the Knowledge Base to see full size versions of screen captures.


Creating a New Salesforce Opportunity from IBM  Notes

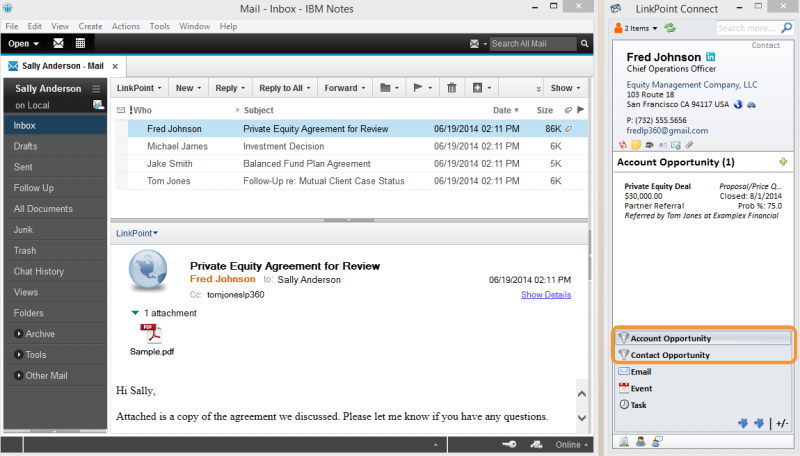
Step_1 Select an email and note that the LinkPoint Connect Side Panel displays the related contact information. Select Account Opportunity or Contact Opportunity on the Navigation Pane to display the Related Information for the contact.

Create_SFOpportunity_lnsf_1


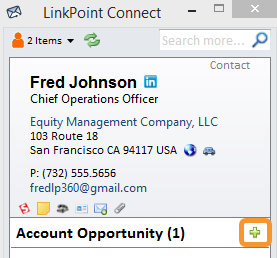
Step_2 Click the Create a new item icon to create a new opportunity. This will launch Salesforce in your Internet browser.

Create_SFOpportunity_lnsf_2


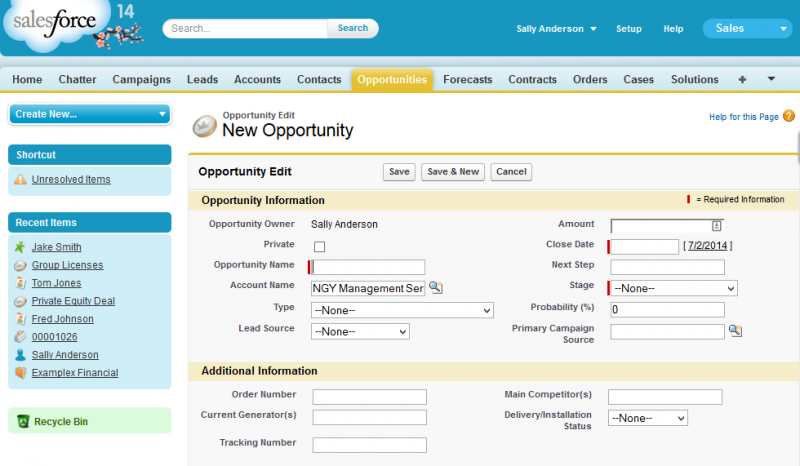
Step_3 Enter any required or additional information in the Salesforce Opportunity record. Note that the Account Name field is prepopulated within Salesforce by LinkPoint Connect. Click Save to create the record.

Create_SFOpportunity_lnsf_3


Tip_Web Tip: LinkPoint Connect will not override any existing business rules within your instance of Salesforce. If additional fields are required as part of the opportunity creation, the user will need to enter the information in order to proceed.


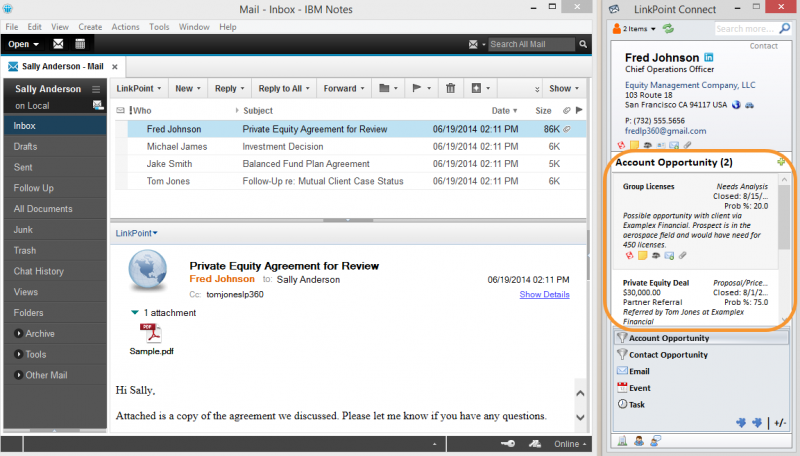
Step_4 Return to IBM Notes and select the email that corresponds with the new opportunity. Note that the LinkPoint Connect Side Panel now displays the new opportunity information from Salesforce.

Create_SFOpportunity_lnsf_4


Download_WebDownload: Access the complete LinkPoint Connect: IBM Notes + Salesforce User Guide in .pdf format. Get the User Guide


Support_Web Still need help? Contact our Support Team.